If you’ve ever admired those magical photos where car lights look like glowing ribbons or waterfalls flow like silky clouds — guess what? You can capture that same cinematic magic using your iPhone’s long exposure feature! 📸✨ No fancy DSLR, no bulky gear — just your iPhone, a bit of creativity, and the right tricks.
This complete guide will show you everything about long exposure on iPhone — from using the built-in Live Photo feature to pro-level apps, editing secrets, and aesthetic ideas. Whether you’re a content creator, traveler, or photography enthusiast, this article will turn your iPhone into your pocket-sized light painter. 💫
📷 What Is Long Exposure iPhone Photography?
- Long exposure iPhone photography means keeping the camera’s “shutter” open longer to blur motion beautifully.
- It transforms moving lights, water, and clouds into smooth, dreamy patterns.
- On iPhones, it’s done computationally — the device blends multiple frames for a soft, flowing effect.
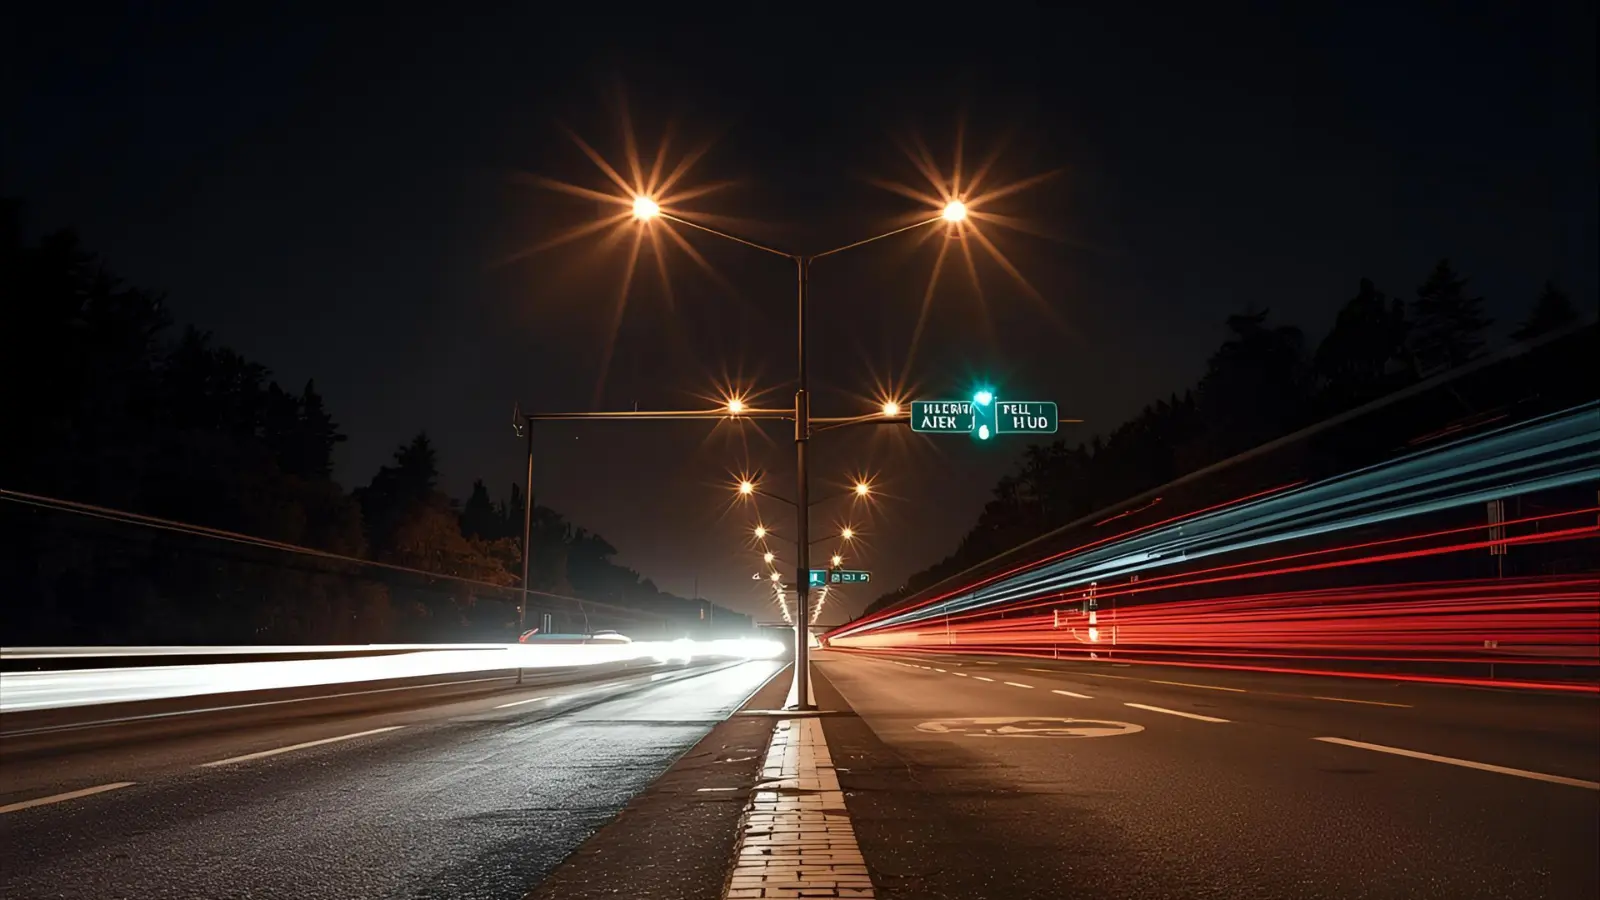
- You can use it to capture waterfalls, night skies, light trails, and even busy streets.
- No professional camera is needed — even older iPhones can do it with Live Photos!
- Long exposure adds a cinematic feel and a storytelling vibe to your shots.
- It’s perfect for aesthetic reels, travel blogs, and night photography content.
- Think of it as painting with time — each second adds more artistic flair!
- You’ll see ghostly trails, soft motion, and ambient light blending together.
- Great for minimalists who love natural, emotion-filled photos.
- Works best in low light or at twilight hours for balanced exposure.
- A stable phone and some patience are the secret ingredients.
- The result? Photos that feel alive and surreal — pure Instagram magic!
- In short: long exposure = movement + mood + magic. ✨
- Let’s dive deeper into how to master it!
🪄 How to Take Long Exposure iPhone Photos Using Live Photos
- Open your iPhone Camera app and make sure the Live Photo icon (three circles) is ON.
- Hold your phone steady (a tripod or even a coffee cup works!).
- Take your shot — ideally of something that’s moving, like water or traffic.
- Now, open your Photos app, swipe up on the Live Photo, and choose “Long Exposure.”
- Watch the movement blur into a gorgeous, dreamy streak! 💨
- Works beautifully with waterfalls, fountains, fireworks, or car headlights.
- Try capturing moving clouds or ocean waves for cinematic vibes.
- If you shake your hand slightly — results will blur too much, so keep steady.
- No need for third-party apps; this feature is built-in since iPhone 6s.
- Long exposure via Live Photo is best for 1–3 seconds of motion.
- The brighter the light, the shorter the motion you should capture.
- You can always revert the photo back to “Live” if you change your mind.
- No pro settings required — just a good eye and timing.
- It’s an easy, zero-cost way to explore artistic iPhone photography.
- Pro tip: frame a static object (like a bridge) with moving elements (cars or water) for contrast.
📲 Best Long Exposure iPhone Apps for Pro Control
Want more control? Try apps that let you manually adjust exposure time, ISO, and shutter speed.
- Spectre Camera — AI-based app for stunning light trails and motion blurs.
- Slow Shutter Cam — classic app for smooth water and night photography.
- ProCamera+ — offers manual exposure, focus, and RAW shooting support.
- Halide Mark II — combines manual control with computational photography.
- NightCap Camera — great for astrophotography and night-time long exposures.
- Camera+ 2 — ideal for creative motion effects and real-time preview.
- LightTrail — designed for light painting and traffic trail photography.
- Manual App — gives you DSLR-like control with shutter speed sliders.
- ReeHeld — stabilizes handheld shots automatically.
- Slow Shutter Fast Motion FX — perfect for dynamic motion blending.
- NeuralCam — low-light champion for clear, long-exposed shots.
- Obscura 3 — has beautiful filters for post-processing.
- ProCam 8 — combines ProRAW and long exposure modes seamlessly.
- Lumy — helps calculate best light times for golden-hour shots.
- LongExpoFX — ideal for beginners experimenting with trails and blur.
🌅 Long Exposure iPhone Settings for Perfect Shots
- Set your ISO as low as possible to avoid noise.
- Use manual exposure settings in pro apps (1–5s for moving water).
- Reduce brightness on your phone screen for accurate previews.
- Lock your focus and exposure before pressing the shutter.
- If using Live Photo, choose stable lighting to avoid flicker.
- Use HDR OFF to prevent ghost effects.
- Use gridlines to balance composition (Rule of Thirds works great).
- Turn off flash completely — it ruins the blur effect.
- For bright scenes, add an ND filter (ND8 or ND16).
- Use a tripod or a stable surface to avoid shaking.
- Enable airplane mode — no notifications to shake your phone mid-shot!
- Shoot during golden hour for soft light and natural warmth.
- Avoid windy conditions that can move your tripod.
- Review shots at 100% zoom to check sharpness of static areas.
- Save in HEIF or RAW for better editing flexibility.
🎨 Creative Long Exposure iPhone Ideas
- Capture city light trails on bridges or roads at night.
- Try spinning lights or sparklers for circular motion effects.
- Shoot flowing rivers or fountains for that dreamy waterfall effect.
- Use passing clouds to create surreal sky textures.
- Photograph ferries or boats moving through water for silky reflections.
- Capture crowds in motion while keeping one still subject in focus.
- Try neon signs with light painting techniques.
- Play with carousels or amusement rides for glowing spirals. 🎡
- Capture rain falling under streetlights for moody scenes.
- Try shadow trails from moving dancers or performers.
- Use traffic intersections from above for glowing grids.
- Capture fireworks as they paint the sky — longer exposure = more trails.
- Shoot waves retreating on the beach for soft motion blur.
- Try night cycling trails with bike LEDs.
- Be playful — long exposure iPhone shots are about creative freedom!
🌉 Long Exposure iPhone Night Photography Tips
- Use a tripod or lean your iPhone against something stable.
- Keep exposure between 3–10 seconds for light trails.
- Use apps like NightCap or Spectre for best results.
- Capture traffic lights, glowing signs, or stars for color contrast.
- Adjust white balance for accurate nighttime tones.
- Use dark clothing when shooting to avoid reflection in glass.
- Avoid very bright light sources that overexpose.
- Combine long exposure with Night Mode for balanced light.
- Set timer (3s or 10s) to prevent shake when pressing the shutter.
- Use remote shutter (AirPods volume button works!).
- Clean lens before shooting — smudges glow badly in night shots.
- Focus manually on stationary objects before capturing motion.
- Edit highlights later rather than trying to darken during capture.
- Always shoot in RAW if possible for more editing flexibility.
- Golden rule: steady hand + steady patience = stellar night shots! 🌃
🌊 Long Exposure iPhone Water Photography
- Find a moving water source (river, waterfall, or ocean waves).
- Use a tripod to eliminate any motion shake.
- Lower your ISO and set exposure between 2–5 seconds.
- ND filter recommended for bright daylight conditions.
- Compose with static rocks or trees for contrast.
- Capture at sunrise or sunset for warm colors.
- Keep your lens dry — droplets ruin blur consistency.
- Use Slow Shutter Cam for precise control.
- If handheld, rest elbows on a stable surface.
- Use “Live Photo → Long Exposure” for fast results.
- The slower the water, the longer your exposure should be.
- Edit later with highlights and contrast sliders for texture.
- Try vertical compositions for waterfall depth.
- Avoid moving leaves or people in the frame.
- Water shots are perfect for relaxation and aesthetic posts! 🌧️
💡 Editing Long Exposure iPhone Photos Like a Pro
- Use Lightroom Mobile or Snapseed for clean adjustments.
- Increase clarity to bring out textures.
- Use “Dehaze” to add contrast in foggy shots.
- Adjust white balance for color mood (warm for cozy, cool for dramatic).
- Add slight vignette to focus viewer’s eye.
- Use selective editing to brighten static elements.
- Reduce highlights to balance overexposed light trails.
- Use Curves for cinematic contrast.
- Crop using 16:9 ratio for cinematic feel.
- Avoid over-saturation — natural tones look professional.
- Try adding grain for a vintage film look.
- Save both edited and original versions.
- Use Perspective tool to straighten horizons.
- Always export in full resolution for best results.
- Keep edits subtle — let the motion speak for itself. ✨
💫 Hashtags & Sharing Ideas
- #LongExposureiPhone
- #iPhonePhotography
- #MobilePhotography
- #LightTrails
- #NightPhotography
- #SlowShutter
- #SpectreCamera
- #WaterfallShot
- #iPhoneography
- #DreamyPhotos
- #CreativeBlur
- #SilkyWater
- #CityLights
- #CinematicShot
- #PocketDSLR
❓ FAQs about Long Exposure iPhone Photography
Q1: Can I do long exposure without Live Photo?
Yes! Use apps like Spectre or Slow Shutter Cam to manually control exposure time.
Q2: Does iPhone Night Mode count as long exposure?
Not exactly — Night Mode uses computational stacking, but results are similar.
Q3: Why are my long exposure shots too bright?
Use ND filters or shoot at dusk for softer light.
Q4: How do I stop shaking in handheld long exposure shots?
Use a timer or your Apple Watch as a remote shutter.
Q5: Can I shoot stars or the Milky Way?
Yes! Use NightCap and stable conditions — exposure up to 20s for best results.
🎯 Final Tips for Long Exposure iPhone Magic
- Always shoot multiple takes — motion varies each time.
- Experiment with colors, reflections, and symmetry.
- Learn to love trial and error — results often surprise you!
- Keep your phone charged (long exposure drains battery).
- Don’t worry about perfection — focus on creativity.
- Share your work on Instagram or Pinterest for feedback.
- Save your favorite camera settings in apps.
- Use clouds, water, and traffic — they move beautifully.
- Avoid windy weather for cleaner blur lines.
- Add music or slow-motion video for a full storytelling vibe.
- Remember — the best long exposure photo tells a story, not just shows a blur.
- Your iPhone is a tool; your vision is the art.
- Every shot teaches you something new.
- Keep experimenting — photography is 80% curiosity.
- Turn every motion into emotion. 💙
🏁 Conclusion
Long exposure iPhone photography proves you don’t need a heavy DSLR to create mesmerizing art. It’s about seeing the world differently — every flicker of light, every ripple of water, every passing car becomes your paintbrush. 🎨
With the right apps, patience, and composition tricks, your iPhone can capture time itself. Whether you’re shooting waterfalls, traffic lights, or starry skies, each image tells a story of movement and magic. So grab your phone, step outside, and start painting with light — one second at a time. 💫📱

Chloe Evans is the creative soul behind the heartfelt stories and magical moments shared on this anniversary journey. Passionate about celebrating love, Chloe brings together the beauty of timeless relationships through inspiring narratives, photography, and personal experiences. With a deep appreciation for the milestones that define true love, Chloe’s words capture the essence of enduring bonds and the joy of every anniversary moment.